Installation Guide
Building wasp-os from source
Install prerequisites
The Python tooling used to build wasp-os and run the simulator is managed with uv, which also fetches a suitable Python (3.14 or later) if your system does not have one. After installing uv, run this from the top of the wasp-os tree:
uv sync
This creates a .venv with everything needed to build firmware and run the
simulator and its tests. Run make through uv so that it uses that
environment, for example uv run make -j`nproc` BOARD=pinetime all or
uv run make check.
Talking to a watch over Bluetooth (tools/wasptool, OTA updates) needs two
extra modules that build against system libraries, so install their
development packages first and then add the ble group. On Debian or
Ubuntu:
sudo apt install libdbus-1-dev libgirepository-2.0-dev libcairo2-dev pkg-config
uv sync --group ble
To regenerate the documentation add the docs group and install graphviz:
sudo apt install graphviz
uv sync --group docs
Building the firmware also needs the usual build tools and a toolchain for the Arm Cortex-M4. Your distribution’s packages are fine (tested with Debian’s gcc-arm-none-eabi 14.2); the CI uses the Arm GNU toolchain 10-2020-q4. On Debian or Ubuntu:
sudo apt install wget git build-essential unzip \
  gcc-arm-none-eabi libnewlib-arm-none-eabi
Note
There are known problems with toolchains older than gcc-7.3 when link time optimization is enabled during the MicroPython build (LTO is enabled by default).
Install prerequisites via Docker
Note
For the Docker-based setup, an x86 host machine running Linux with Xorg is assumed. Other setups may require some patching for now.
To build or flash wasp-os with Docker, ensure Docker is installed and set up. Then, run the following commands from within the project’s root path:
make build-docker-image
make run-docker-image
This will build the wasp-os Docker image locally and launch an interactive
container from it. The Docker container runs BASH from the project’s root path
and all make commands should be usable from this shell, including make
sim and make check.
Some commands that interact with Bluetooth, such as wasptool, require that
Bluetooth is enabled in the host OS. Bluetooth devices will then be accessible
from within the Docker container.
Install prerequisites via Nix
Note
This setup method uses the gcc-arm-embedded package from nixpkgs, version 14 where nixpkgs has it, which is the toolchain the firmware is tested with; gcc 13 is known to work as well. If you encounter any problems please try the manual installation above and report the issue in the issue tracker.
To build wasp-os with Nix, ensure it is installed then open a terminal and run the following command in the wasp-os repository:
nix-shell tools/nix/shell.nix
Or if you are using the experimental flake commands:
nix develop ./tools/nix
You will be dropped in a shell where all required dependencies are available.
All make commands should be usable from this shell.
Build
Fetch the submodules and the Nordic SoftDevice (the Bluetooth stack) once:
make submodules
make softdevice
Then build everything for the PineTime, the only board this branch currently builds for (see Device Support):
uv run make -j `nproc` BOARD=pinetime all
The output is stored in build-pinetime/:
micropython.zip: the main OS image, installed over the air (see wasptool for GNU/Linux)bootloader.hexandbootloader-daflasher.zip: the wasp-bootloaderreloader*.zip: the reloader, used to install or update the bootloader over the air
To build only the main OS image use uv run make -j `nproc` BOARD=pinetime
micropython, and to build the optional apps in apps/ (which can be copied
to the watch at run time) use uv run make apps.
To run the simulator and its test suite (no toolchain needed):
uv run make sim
uv run make check
To rebuild the documentation:
uv run --group docs make docs
The docs will be browsable in docs/build/html as per Sphinx standards.
About the MicroPython build
wasp-os builds against upstream MicroPython using its nrf port. Everything wasp-os needs on top of that lives in this repository rather than in a MicroPython fork:
wasp/boards/pinetime/micropython/is an out-of-tree board definition, passed to the nrf port asBOARD_DIR: the board configuration, pin map and linker scripts.wasp/modules/waspnrf/is a small C module with the glue the board needs: starting the low frequency clock safely after the bootloader, the watchdog feeding, entering the bootloader for OTA updates and the Bluetooth console status.wasp/modules/bma42x-upyis the step counter driver, built as a user C module.
The micropython submodule points at a branch that is upstream MicroPython
plus nrf port fixes that have been submitted upstream but not merged yet;
once they are, it can point at upstream directly.
Custom builds
Wasp-os can be configured to include a custom selection of apps and watch faces using the wasp.toml file. There are many more apps available than can fit on a device. Choose your favorites and roll your own flavor of wasp. Apps that are configured as quick_ring will be automatically added to the wasp quick ring (swipe left and right from the watch face). If an app is configured with auto load it will load into memory at startup and any apps that are not auto loaded can be enabled using the software app. Add as many watch faces as you like and switch between them using the faces app.
Binary downloads
The wasp-os project provides two different forms of binary downloads:
Official releases
Continuous Integration (CI) builds
Official releases are the recommended binary releases for wasp-os. They contain
this documentation together a set of binaries for each of the supported devices
in appropriately names directories (build-<board>/). The official release
can be downloaded from:
https://github.com/wasp-os/wasp-os/releases .
The CI builds are built automatically whenever the wasp-os source code is changed. That means the builds are less well tested than the official releases but they contain all the recently added features and fixes so if you want to run the latest and greatest wasp-os on your watch then the CI builds are fo you. To download the latest CI build you need to be logged into a github account and you can navigate to the latest CI build using the link below (follow the link to the most recent “workflow run results” and then scroll down to find the artifacts): https://github.com/wasp-os/wasp-os/actions?query=is%3Asuccess+branch%3Amain+workflow%3Abinary .
Warning
If you have a sealed device (e.g. no means to debrick your watch using an SWD debug probe) then be aware that, because CI builds are cutting edge, there is a small risk of bricking. In particular it is strongly recommended not to install the bootloader from the CI builds on sealed devices. Instead use the bootloader from the previous official release. If in doubt… wait!
If you fork the wasp-os repo on github then CI builds will automatically be enabled for your fork too! This can be very useful as any changes you commit to the repo will be automatically tested and github will share the results with you. You can also download your CI builds for testing using a similar approach to the one above.
Device Support
Wasp-os can run on multiple devices and, in time, will hopefully be ported to many more.
In terms of deciding which device to buy we can suggest two criteria to help.
The first is simply based on aesthetic appeal. A watch is something that you take everywhere and sits somewhere between clothing and jewellery. That means it is important to choose a device that feels good on the wrist and looks right when you glance at it. Aesthetics matter!
The second criteria is more subtle. In most cases, there is not really many important technical differences between the devices. They all use a Nordic chipset and have the same display controller running a 240x240 panel. So the second criteria is not technical, it is about community. The Pine64 PineTime is unique among the devices supported by wasp-os because it is intended that the watch be used to run a variety of different open source or free software operating systems. By manufacturing a watch with the intention that it be hacked every which way from Sunday then we get a bigger, stronger community focused on the PineTime. There is a vibrant support forum, multiple different OS developers (who share ideas and knowledge even when hacking on very different code bases) combined with a near complete set of hardware documentation.
There’s definitely a lot of fun to be had buying something off-the-shelf and hacking it to become something the manufacturer never intended. We know this because we’ve done it! However there is also enormous benefit from participating in a community, especially if you enjoy working with or learning from other developers. Devices that can repurposed to run wasp-os are often only sold for short periods and may experience undocumented technical changes between manufacturing runs that can cause compatibility problems. This makes it hard for a large community to form around these devices.
Thus the second criteria it to think about your own needs and abilities. If you want to enjoy the social and community aspects of working together on open source watch development then you should look very closely at the PineTime.
Pine64 PineTime
Pine64 PineTime is a square smart watch based on an nRF52832 SoC and includes a 240x240 colour display with touch screen, a step counter and a heart rate sensor.
wasp-os can be installed directly from the factory default operating system using an over-the-air update with no tools or disassembly required. Gadgetbridge for Android can be used to install both the wasp-bootloader and the main OS image.
Note
The early adopter PineTime Developer Edition came pre-programmed with a proprietary test firmware rather than the current factory default OS. If you have an early adopter unit then it will appear in the device list as Y7S. In this case the process needed for an OTA update is different. Use DaFlasher for Android to install both the wasp-bootloader and the main OS image.
The developer edition comes without the case glued shut. This allows access to the Serial Wire Debug (SWD) pins which can make debugging easier. On developer edition devices it is also possible to install the wasp-bootloader using an SWD programmer.
The wasp-os simulator
The simulator allows you to run wasp-os programs using the Python interpreter included with your host operating system. The simulator provides a 240x240 colour display together with a touch screen and a physical button, all of which appears as a window on your host computer.
The simulator has large quantities of memory and, whilst useful for exploring wasp-os and testing your programs are syntactically correct, it is not a substitute for testing on real hardware. See Testing on the simulator for more details on how to use the simulator.
To launch the simulator try:
make
sim
Colmi P8
The Colmi P8 is an almost square smart watch based on an nRF52832 SoC and includes a 240x240 colour display with touch screen, a step counter and a heart rate sensor.
Warning
The P8 has multiple hardware revisions and the newest version (the one that includes a magnetic charger) uses a different and, currently, unsupported step counter module. The new models will boot wasp-os successfully but the step counter application will be disabled and cannot function.
DaFlasher for Android can be used to install both the wasp-bootloader and the main OS image. No tools or disassembly is required.
Note
The P8 is not currently built: it has no board definition for upstream
MicroPython yet (the PineTime’s in wasp/boards/pinetime/micropython
is the model to follow). Older releases support it.
Senbono K9
The Senbono K9 is a circular smart watch based on an nRF52832 SoC and includes with a square 240x240 colour with a touch screen, a step counter and a heart rate sensor.
The wasp-os port for Senbono K9 does not, at this point, include a driver for the touch screen because the protocol has not yet been reverse engineered. The touch screen enumerates via I2C at address 70d (0x46) and the interrupt can be used to detect touch screen activity but the touch coordinates cannot be read from the hardware. Currently the touch screen can only act as a multi-function button and can be used to cycle through the quick ring and display notifications. This makes the device usable but not fully featured.
Note also that the to conceal the square display within the circular face this device has a heavily tinted filter over the display. This improves the look of the device but also significantly dims the backlight making it difficult to read the display in strong sunlight.
DaFlasher for Android can be used to install both the wasp-bootloader and the main OS image. No tools or disassembly is required.
Note
The K9 is not currently built: it has no board definition for upstream
MicroPython yet (the PineTime’s in wasp/boards/pinetime/micropython
is the model to follow). Older releases support it.
Installing wasp-bootloader
Note
This step is only for a watch that still runs InfiniTime (or another
mcuboot-based firmware). A watch that already runs wasp-os has the
wasp-bootloader: skip to Installing wasp-os and send
micropython.zip only. reloader-mcuboot.zip is built to run under
mcuboot; sent through the wasp-bootloader it is written to the application
area, the bootloader jumps into it, the watchdog restarts the watch, and
the bootloader logo repeats. Holding the button while the watch
restarts keeps the bootloader in OTA update mode, where micropython.zip
can be sent again.
Gadgetbridge for Android
For Pine64 PineTime devices running Infinitime then Gadgetbridge for Android can be used to install wasp-bootloader:
Ensure the watch is fully charged before attempting to install the wasp-bootloader. Running out of power during this process can brick sealed devices.
Copy
reloader-mcuboot.zip(see Building wasp-os from source) to your Android device and download Gadgetbridge for Android if you do not already have it.Wake the device so that InfiniTime is showing a watch face.
Connect to the InfiniTime device using Gadgetbridge, tap on the “+” button on the bottom right of the screen to add a new device, InfiniTime should be detected.
Tap on it and Gadgetbridge will pair and connect to your device. Use the file browser application and find and send
reloader-mcuboot.zipto the device.When the progress meter reaches 100% Gadgetbridge will disconnect and the watch will reboot.
The watch will boot the reloader application which draws a small blue pine cone in the centre of the screen. The pine cone acts a progress meter and will slowly become white. Once the update is complete the watch will show the wasp-os logo and an additional on-screen prompt.
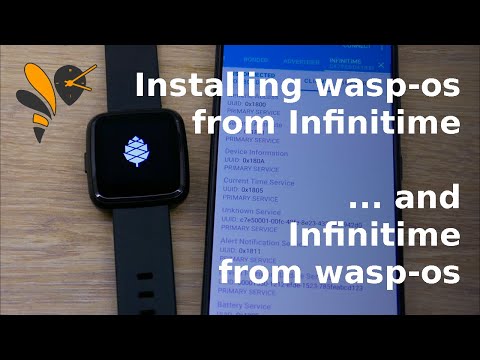
Over-the-air update from Infinitime to wasp-os
Note
If you want to restore the PineTime factory firmware then you can
use Gadgetbridge to do this. Perform a long press reset and then
use Gadgetbridge to send reloader-factory.zip to the PineDFU
device. GadgetBridge may list PINE DFU as an unsupported device.
See the work around at the end of
main OS image.
DaFlasher for Android
To install the bootloader using DaFlasher for Android:
Ensure the watch is fully charged before attempting to install the wasp-bootloader. Running out of power during this process can brick sealed devices.
Download and install DaFlasher and copy the DaFlasher bootloaders to your Android device. You will need DaFitBootloader23Hacked.bin and FitBootloaderDFU2.0.1.zip.
Copy
bootloader-daflasher.zip(see Building wasp-os from source above) to your Android device.Open the app and connect to the device (e.g. Y7S if you have a developer edition PineTime).
Read the disclaimer carefully, then click Ok. PineTime).
Click Select file and choose
DaFitBootloader23Hacked.bin, then wait for the payload to be transferred and for the install process to complete on the watch (leaving three coloured squares on the display).Press the Back button to return to the scanner and connect to the device. The device name will have changed to ATCdfu.
Click Do DFU Update.
Click Select DFU file and select
FitBootloaderDFU2.0.1.zip, then wait for the payload to transfer and the update to take place. The watch should be showing a single red square which is captioned ATCnetz.de.Click Select DFU file again and select
bootloader-daflasher.zip. Once the update is complete the watch will show the wasp-os logo and some additional on-screen prompt.
It is important to ensure that both bootloader-daflasher.zip
and micropython.zip match the device you are installing for. There are
no runtime compatibility checks.
An end-to-end video of the above process (and the final install of wasp- os) is also available:
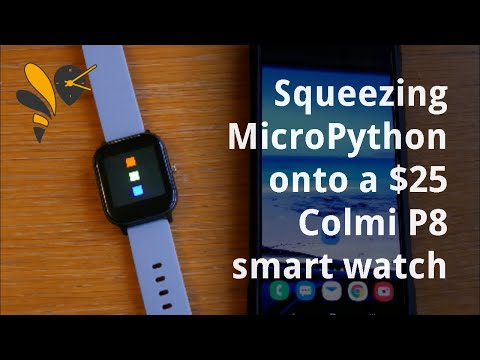
Installing MicroPython on a Colmi P8 smart watch using DaFlasher
Warning
The first step cannot be reversed. Once DaFitBootloader23Hacked.bin
has been installed the factory firmware will be permanently removed
from the device.
Although it is not possible to restore the factory firmware it is possible to switch back to Softdevice 5.0.1 and/or Softdevice 2.0.1 on order to run alternative firmwares such as ATCwatch. The zip updates in DaFlasherFiles cannot be applied directly but we can return to the DaFlasher bootloaders by installing DS-D6-adafruit-back-to-desay-sd132v201.zip followed by ATCdfuFromSD2toSD5.zip
Using an SWD programmer
There are many different SWD programmers that can be used to install wasp-bootloader. Use the PineTime SWD programming guide to lookup the specific instructions for your programmer.
Use the SWD programmer to install bootloader.hex to the device.
This file is an Intel HEX file containing both the bootloader and the Nordic
SoftDevice. Once the bootloader is installed the watch will boot, display a
logo and wait for a OTA update.
Note
If you have a new device then it may have been delivered with flash protection enabled. You must disable the flash protection before trying to program it.
Be careful to disconnect cleanly from the debug software since just pulling out the SWD cable will mean the nRF52 will still believe it is being debugged (which harms battery life because the device won’t properly enter deep sleep states).
Installing wasp-os
Note
Updating from wasp-os 0.4 or an earlier build? The filesystem on the
watch is reformatted on the first boot, because LittleFS now uses the
flash chip’s 4 KiB blocks. Copy anything you want to keep off /flash
first (tools/wasptool --pull), and expect the default main.py
afterwards.
Going back the other way needs a step more: an older build hangs at “Mount FS” on the new filesystem instead of reformatting it. Wipe the filesystem from the running watch first, then flash the older build, which formats the empty chip on its first boot:
tools/wasptool --wipe --ota micropython.zip
Gadgetbridge for Android
To install the main firmware using Gadgetbridge for Android:
Copy
micropython.zip(see Building wasp-os from source) to your Android device and download Gadgetbridge for Android if you do not already have it.Ensure the watch is running in OTA update mode.
Connect to the device (e.g. PineDFU if you have a PineTime) using Gadgetbridge, use the file browser application and send
micropython.zipto the device.When the upload is complete the watch will reboot and launch the digital clock application.
Note
GadgetBridge may list PINE DFU as an unsupported device. This prevents users from
sending the micropython.zip file to the device. Do the following to work around
this: In GadgetBridge, go to discovery and pairing options and allow unsupported
devices.
The Pinetime will show up as an unsupported device. Long-press it and select Add
as a test device. A list of devices will show up. Scroll down to Pinetime and select
it. The device will be added and you then can upload the micropython.zip file.
DaFlasher for Android
To install the main firmware using DaFlasher for Android:
Copy
micropython.zip(see Building wasp-os from source) to your Android device and download DaFlasher if you do not already have it.Ensure the watch is running in OTA update mode.
Open the app and connect to the device (e.g. PineDFU if you have a PineTime).
Click Do DFU Update.
Click Select DFU file and select
micropython.zip.When the upload is complete the watch will reboot and launch the digital clock application.
wasptool for GNU/Linux
To install the main firmware from a GNU/Linux workstation, set up the ble
environment (uv sync --group ble). If the watch is running wasp-os, one
command puts it into OTA update mode and uploads
micropython.zip (see Building wasp-os from source):
uv run --group ble tools/wasptool --ota build-pinetime/micropython.zip
A full update takes about three and a half minutes.
If the watch is already in OTA update mode, use ota-dfu directly with the
watch’s Bluetooth address (bluetoothctl scan le lists it; the bootloader
advertises as PineDFU):
uv run --group ble tools/ota-dfu/dfu.py --legacy \
  -z build-pinetime/micropython.zip -a A0:B1:C2:D3:E3:F5
Both exit with a non-zero status if the update fails.
Troubleshooting
there are three boot modes of the device: ota update mode, safe mode and normal operation. understanding these modes is useful to help troubleshoot installation and boot problems.
OTA update mode
Bootloader mode is entered automatically of the boot image is invalid or if the watchdog fires when running in another operating mode. OTA update mode can also be can also be entered manually by holding a physical button on the device for five seconds until the boot logo re-appears. When running in OTA update mode pressing the physical button will attempt to launch the application.
Note
To remain in OTA update mode it is import to release the button as soon as the boot logo appears otherwise you may accidentally request the bootloader restart the application!
When the bootloader starts it will display a boot logo for two seconds and will then either boot the application or enter OTA update mode. OTA update mode is easily recognised by the Bluetooth logo in the bottom right hand corner of the display.
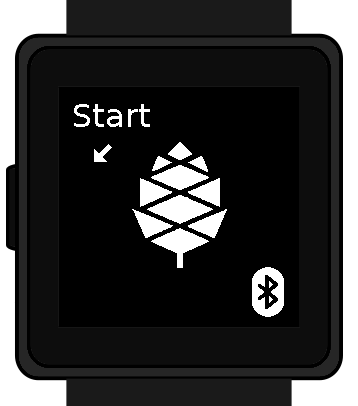
When the device is in OTA update mode then it will enumerate with a name
ending in DFU (Device Firmware Update). This device can be used to
update the application image.
Safe mode
Safe mode is a special boot mode of the application that does not execute
main.py automatically (and hence that the watch will not fully boot).
This ensures the Python REPL is accessible for debugging. Safe mode also
causes the watch to show it’s boot activity on the screen which can be
useful for fixing hardware problems.
Safe mode is entered if the physical button is held down when the boot
logo disappears and the application first starts. The simplest way to
enter safe mode is to hold down the physical button until Init button
appear on the screen, then release it.
A device running in safe mode will display the message Safe mode
on the display. To exit safe mode return to OTA update mode by
holding down the physical button for five seconds and from there
a short press of the button will return the device to Normal operation.
Normal operation
Underneath the covers normal operation is near identical to safe mode. There are only two differences:
the boot messages will not appear unless a fault is detected (in which case
FAILEDwill appear on the display)it will execute whatever it finds in
/flash/main.py
A default version of main.py is installed automatically when wasp-os initially
formats the external flash as a file system.
Most problems with normal mode operation occur either because main.py is
missing, out-of-date or corrupt, or because too many applications are being started
by default, resulting in the system running out of RAM.
Out of memory problems are best addressed by reducing the number of applications you have set to automatically load (auto_load in wasp.toml). If you are developing your own application, it is best that you load the minimal set of applications to have the maximum possible amount of available RAM and minimum fragmentation. For example, only autoloading the software app will get you the maximum amount of RAM.
Note
If the system reports FAILED at boot, in either safe mode or normal operation, then the best troubleshooting approach is to review the issue tracker. Initially look through the open issues and see if your problem is similar, if so there may be useful advice in the comments on the ticket. Otherwise if you cannot find anything similar then please raise a new issue.
main.py
By default main.py includes the following commands and, in normal operation, these will be executed to boot the watch:
# SPDX-License-Identifier: LGPL-3.0-or-later
# Copyright (C) 2020 Daniel Thompson

import wasp
from gadgetbridge import *
wasp.system.schedule()
One of the most powerful troubleshooting techniques (and one that is usually
effective in debugging “black screen” issues) is to switch to safe mode and
run the contents of main.py by hand using a bluetooth console (typically
either wasptool --console or an Android tool such as Serial Bluetooth
Terminal). Either the watch will start running when started by hand or it will
issue diagnostics via the console which can be captured and shared via the
issue tracker.
If the watch can be successfully started by hand then it is likely the copy
of main.py on your watch is broken, missing or out of date. You can explore
the watch’s filesystem using the shell module:
from shell import *
cd('/flash')
ls
cat('main.py')
If your copy of main.py needs to be updated you can use wasptool
to upload a new version:
tools/wasptool --upload wasp/main.py
Note
If you are not able to run wasptool on your system but have another means
to access to the python REPL you can also use shell.upload() to
manually upload a new version of main.py.